5 Ways To Make Angel Food Cake Without A Tube Pan
Can you make Angel food cake in a regular ol’ cake pan? – The quick answer: Yes, yes, you can! While it is ideal to make Angel food cake in a tube pan if you don’t want to spend the extra money on one or you are just craving that soft pillow deliciousness that only an Angel food cake offers, there are some workarounds. Below you will find several unconventional ways to bake an Angel food cake, including a traditional 8 or 9-inch cake pan, a 9×13 baking dish, and even a loaf pan! We’ve covered it all!
Angel food cake is a hallmark of many American households. It’s the perfect dessert to make when you’re left with a bunch of leftover egg whites, and its cloud-like texture makes it unique and oh-so-indulgent. Plus, all you need to bake it is five staple ingredients; egg whites, sugar, flour, cream of tartar, vanilla, and a tube pan… Wait, you don’t have a tube pan? Well, that’s a serious issue! Just joking! Not all of us have a special angel food cake pan in our homes. However, one thing we all do have in our homes is a regular cake pan, so… Can you make angel food cake in a regular cake pan?
In this post, we will discuss 5 different methods for making an Angel food cake without using a tube pan. We will start with the classic method, using a regular square cake pan. Then, we will show you how to make an Angel food cake in a loaf pan as well as a round 8in cake pan. Next, we will demonstrate how to use a springform pan to make your Angel food cake. Finally, we will teach you how to make an Angel food cake in a 9×13 baking dish. Let’s get started!
What pan do you cook angel food cake in?
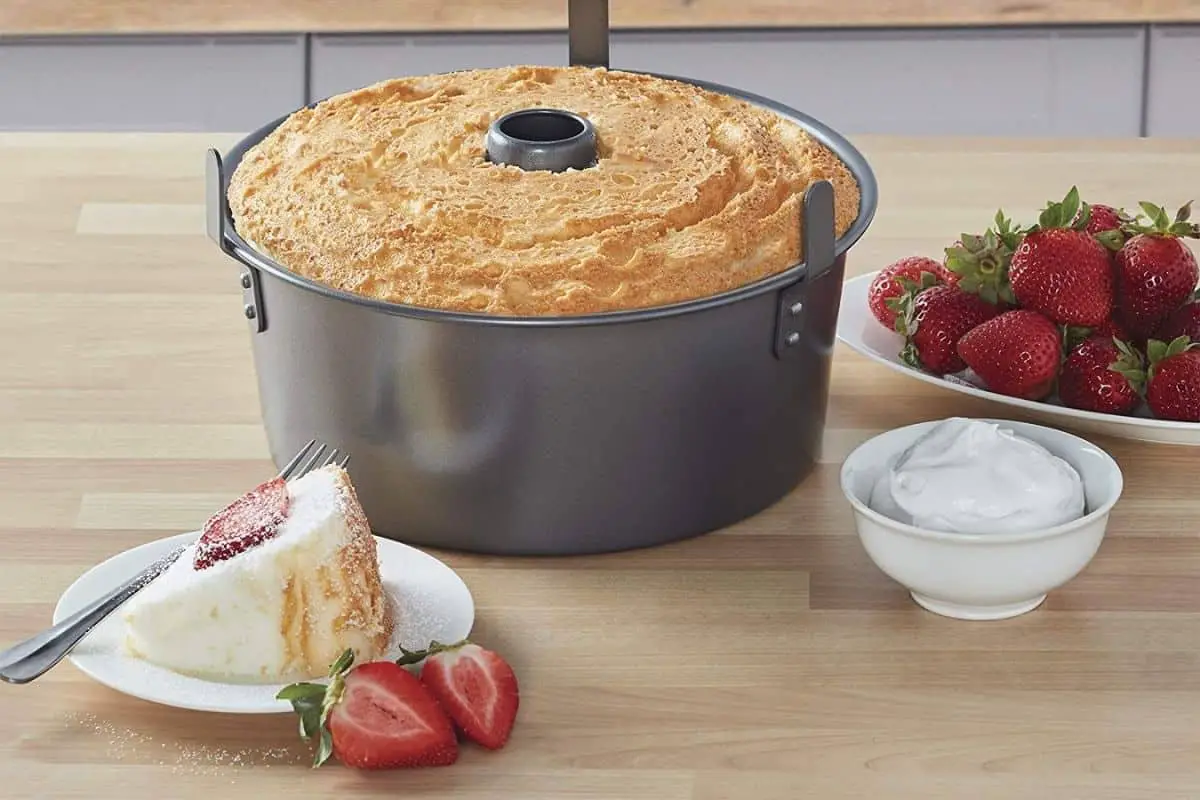
A tube pan. Angel food cake is a special cake, so of course, it needs a special pan. That special pan is known as a “tube pan,” and its two essential qualities are that a) it’s round, usually without any decorative shape, and b) it has a hollow tube in its center.
You can find tube pans in both aluminum and carbon steel, but TBH, both presentations are fine and fulfill their main purpose, which is to bake an angel food cake as soft as a feather.
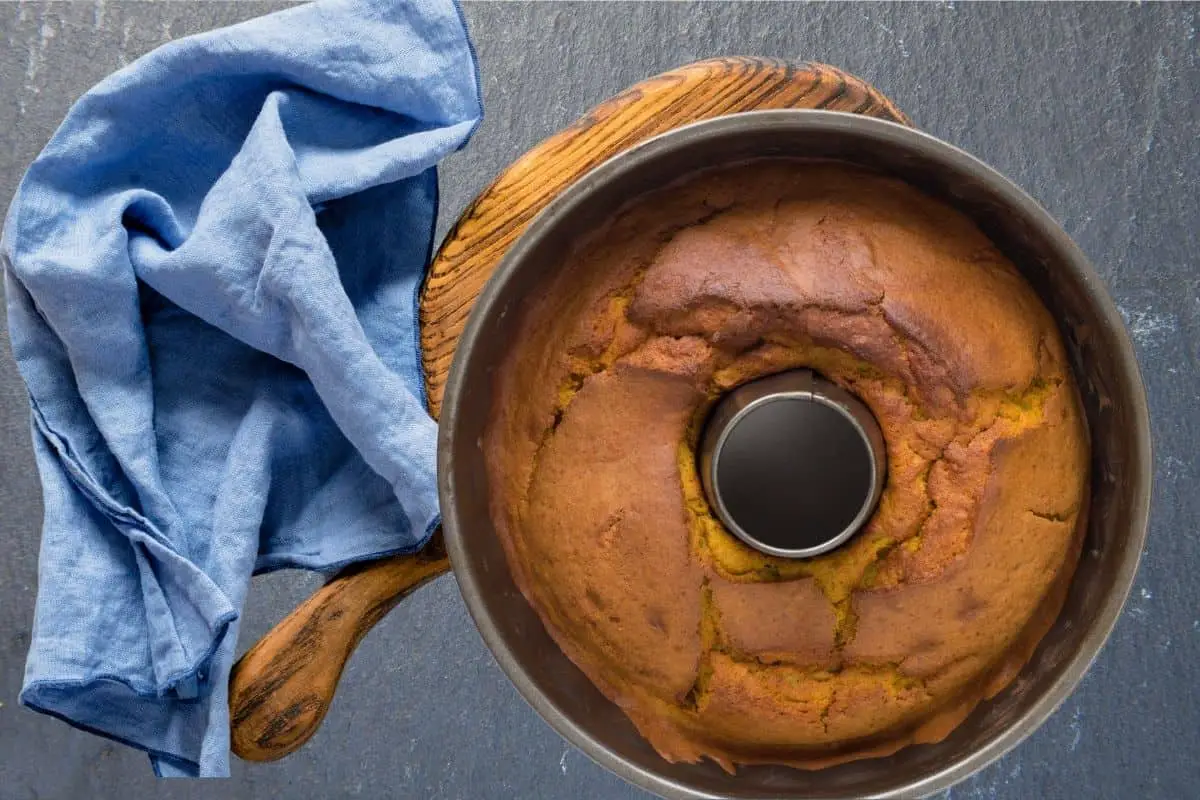
Is an angel food cake pan a bundt pan?
No, bundt pans are not the same as Angel food cake pans, aka tube pans. After looking at a picture of what a tube pan is and realizing that it has a hole in the middle, you might think, “Hmm, can I use a Bundt pan for angel food cake? I mean, it’s essentially a tube pan!”, but no, don’t dig through your kitchen drawers for that Bundt pan you inherited from your grandma just yet, because a Bundt pan is not the same as an angel food cake pan. You see, a tube pan has straight sides and an uncoated finish, whereas a Bundt pan has fluted sides and a nonstick coating, both characteristics being the worst enemies of angel food cake.
Starting with the fluted sides, the decorative design that Bundt pans have is very intricate for angel food cake as it needs a smooth surface to slide out smoothly from the pan once it is baked. Yes, if you use this pan, your angel food cake will look like a delicious sculpture, but probably half of it will stay inside the pan. And as for the nonstick coating, that’s the first reason why you shouldn’t even think about baking your angel food cake in a Bundt pan because if you do, the cake won’t rise. The magic of tube pans is their uncoated walls, but we’ll talk about that in the next heading.
Plus, Bundt pans don’t have removable bottoms — while tube pans do —making the task of removing the cake from the pan once it cools much harder.
WHY ARE ANGEL FOOD CAKES MADE IN A SPECIAL PAN?
Tube pans are not designed just to leave a hole in the middle of your angel food cake. They actually help your cake in 2 major ways: by allowing it to rise and by providing more heat to the center of the cake.
Since angel food cakes are egg foam-based and don’t require baking powder or baking soda, the only way to make them rise is to let the batter “climb” up the sides of the pan. How do we make this happen? Well, by simply baking the cake in a tube pan. As we briefly explained in the heading above, tube pans don’t have any nonstick coating, so their “raw” walls are the perfect climbing walls for angel food cake.
Going back to the shape of the tube pan itself, the purpose of its signature hollow cylinder in the middle is to provide more heat to the center of the cake so that the batter in the center sticks to it, rises, and sets at the same time as the outside. Isn’t that amazing?
Can you make angel food cake in a regular pan instead of a tube pan?
It’s time to answer the million-dollar question: if you don’t have a tube pan because you don’t want to have something in your kitchen that only serves one specific duty, can you make angel food cake without a tube pan? Yup, you can make it in a regular pan!
However, to successfully bake an angel food cake in a regular pan, you need an essential component of tube pans: a metal cylinder. If you bake the cake just by pouring it into the pan like a regular cake, it won’t rise, and your dreams of eating a slice of heaven will sink.
Fortunately, we have an idea for you to tweak your regular pan into a tube pan, and it involves a metal can or a spice tin.
How to Make an Angel Food Cake Using a Regular Cake Pan
Not everyone has a tube pan in their kitchen, but you most likely have a regular cake pan in yours. So, if you want to bake an angel food cake without any special gadgets, just grab that good ol’ regular cake pan, a White Claw can, or a spice tin, and follow these steps:
Step 1: Get an empty aluminum can
Get an empty aluminum can — a skinny can like White Claw works best in this scenario —and wrap it with parchment paper. Next, secure it using double adhesive tape and trim away the excess paper. Then, fill the can with water to give it weight. Others use beans and rice, but water is fine if none of those are available. Keep in mind that the can should only be half full of your chosen weight.
Step 2: Assemble the equipment
Place the parchment-wrapped aluminum can at the center of your regular round pan, then cut a round parchment paper and place it on the pan. Also, don’t forget to cut a starburst in the middle of the parchment paper for the aluminum can to fit through. You can trace the aluminum can into the parchment paper and cut it, or you can just sort of eye-ball the shape and cut it right away. Either way, what matters is that the can fits perfectly.
Step 3: Fill the pan with the batter
IMPORTANT: don’t fill the cake pan more than two-thirds full. Angel food cake rises significantly. You don’t want it to spill over the edges.
Step 4: Follow the Angel Food Cake Recipe
Angel Food Cake
Step 5: Remove the Cake from the Pan
Last but not least, cool the cake upside down. The best thing about this hack is that any can is usually taller than the sides of regular cake pans, so once you turn the cake upside down, it will be elevated off of your counter, with a nice airflow. Then, you can use a spatula or thin butter knife to loosen the cake from the pan’s side and peel away the parchment paper from the bottom of the cake.
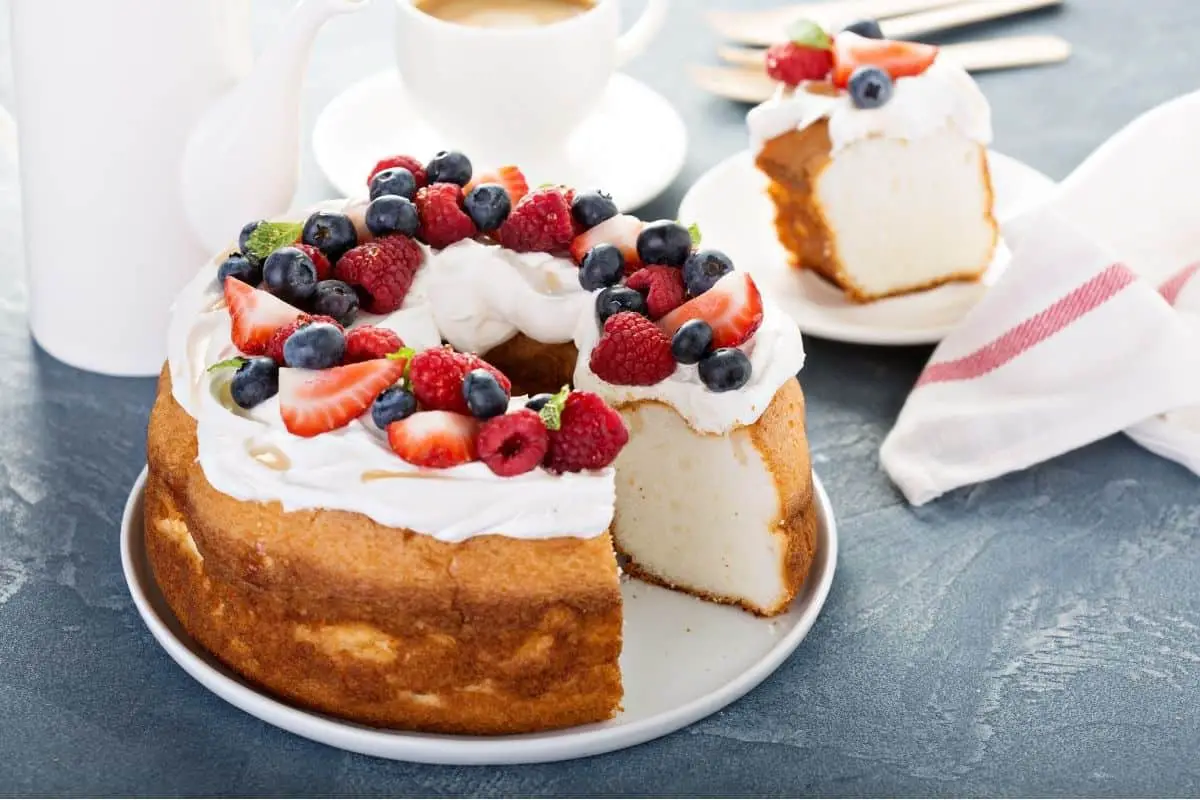
And there you have it! You now have an angel food cake ready to be decorated. Trust us, no one will know you didn’t use a tube pan.

How to Bake An Angel Food Cake Without a Tube Pan
You already know that you can make angel food cake in a regular cake pan, but did you know that you can also make it using other types of molds? Guess the tube pan isn’t so indispensable after all!
You can use a loaf pan, a springform pan, but we’ll stop here — we don’t want to spoil it for you. Here are other pans that you can use when baking an angel food cake:
Use an 8-inch round pan
A regular (9×3) cake pan works wonders, but an eight-inch round pan can absolutely do the trick as well. You can still have the hole in the middle of the cake by placing an aluminum can in the pan, thus recreating the traditional structure of an angel food cake. As easy as ABC!
Use a Loaf Pan Instead of a tube pan
If you want to deviate away from the looks of a traditional angel food cake, simply use a loaf pan. Once the cake is baked, you can slice the cake into rectangular shapes before adding your fruits and frosting. Your angel food cake would not only taste amazing, but also look really fancy and Instagram-worthy.
P.S: A quick way to bake an angel food cake in a loaf pan is using a premade cake mix, like Duncan Hines’. Yes, we know it may not taste the same as when we make it from scratch, but it’s a great way to get a cheap, fluffy dessert that brightens up the day.
Use A Regular Glass Cake Dish
A glass cake pan works almost the same as a tube pan, so you can use that one too. The only issue we found with this method is that glass is heavier than aluminum, so when you turn it upside down, do it carefully on a cooling rack. Oh, and of course, make sure the glass is oven safe.
Instead of tube pan use 9×13 Pan to make your Angel Food Cake
If you want to make a layered angel food cake, use a 9×13 rectangular pan. With this method, you can even make angel food cake “bites” for your entire family to enjoy. Once the cake is done, cut it into small squares, put them into small plates, add frosting and your chosen toppings, and voila! You now have mini angel food cakes for everyone to try.
Use A Springform Pan
Can you make angel food cake in a springform pan? Of course, you can! A springform pan is an ideal substitute in the absence of a tube pan. Its sides are removable; that way, you can easily remove the cake from the pan without any hassle.

How to Make an Angel Food Cake Using 8 inch round pan (Metal or Glass)
Whether you have a metal or glass pan, here’s a quick guide on how to bake an angel food cake in an 8 inch round pan:
Materials:
- Aluminum Can
- Parchment Paper
- Double Adhesive Tape
Instructions:
- Preheat your oven to 350 degrees and prepare the cake batter according to the box or recipe you’re following. If you’d like to keep the traditional hole in the center of your Angle Food cake wrap your aluminum can with parchment paper. *Note: This is completely optional. You can bake your Angle food cake batter withouth the aluminum can in your cake pan.
- Do not grease the pan! Angel Food Cake is better when the batter sticks to the sides of the pan. An ungreased pan will help the batter rise as it bakes.
- Pour your cake batter into two to three pans, filling it with no more than two-thirds full. Adhere to the time and temperature of your chosen recipe.
- Check your cake around the 23 minute mark. If you can insert a toothpick in the center and it pulls out clean, it is done.
- Once the cake is done, cool your cake upside down. The gravity will help the cake maintain its volume. Then, remove the cake out of the pan. You can use a greased spatula to help you release the cake from the pan.
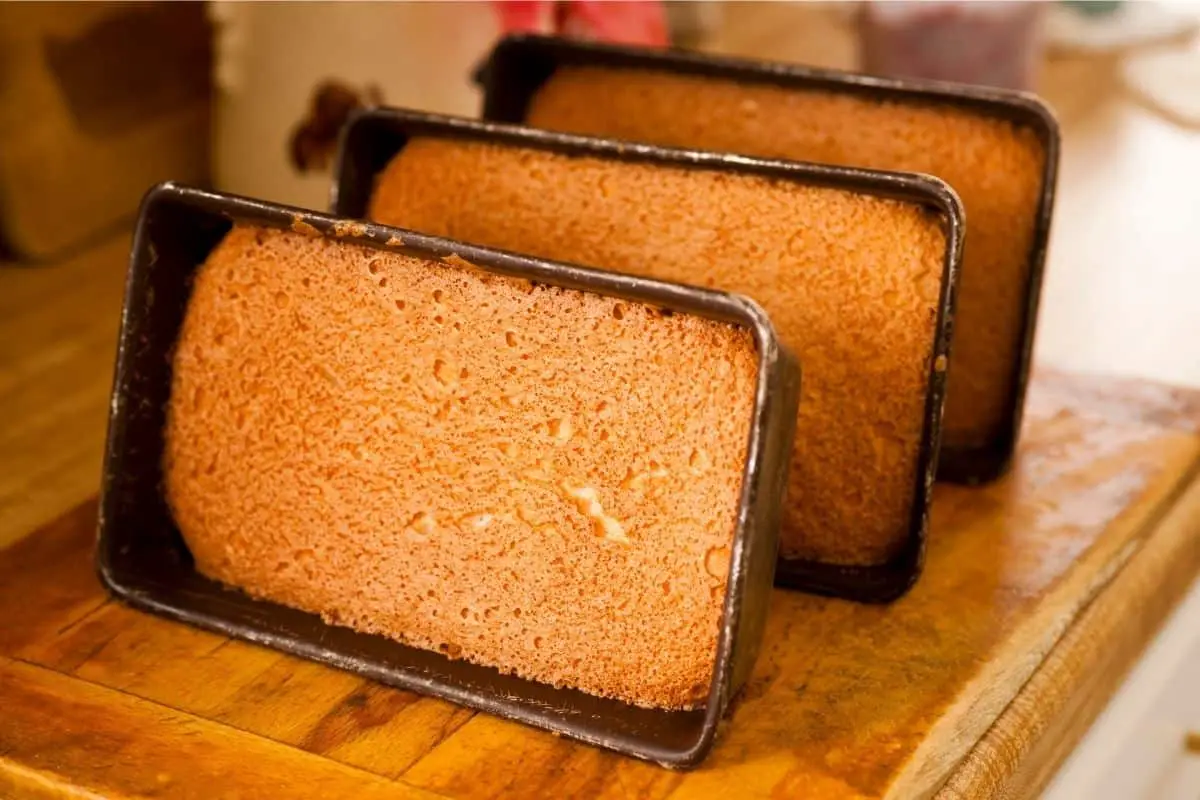
How to Make an Angel Food Cake Using Loaf Pan
Just like we stated above, baking an angel food cake using a loaf pan is the perfect choice for those who don’t want to follow the rules imposed by the culinary society, which states that an angel food cake has to be exclusively round in shape… Or for those who just don’t have a tube pan.
Materials:
- Loaf Pan (Any size of your choice)
- Bread knife
Instructions:
- Preheat your oven to 325. Pour the cake batter into the loaf pan. The batter should not fill the pan more than two-thirds full.
- Do not grease the pan or put on parchment paper. For the batter to rise, it needs to cling to the sides and the base of the pan.
- Bake for 35-40 minutes until the top is slightly sticky and brown.
- Once the cake is done, cool it upside down. The gravity will help the make maintain its volume. Now that the cake has cooled down, start taking it out. You can use a greased spatula to help you release the cake from the pan.
- Slice the cake like you are making bread slices. Serve them on small plates. Add your frosting and fruit toppings.
How to Make an Angel Food Cake Using 9×13 Pan
If you want to bake angel food cake in a 9×13 pan, you can do it! It may not have a traditional look, but it sure looks — and tastes — real good.
Materials:
- 9×13 rectangular pan
- Bread/Cake Knife
Instructions:
- Preheat your oven to 350 degrees and make sure your oven rack is in the middle of the oven. Pour the cake batter into a 9×13 pan. There should be no more than two-thirds of the batter in the pan when you bake it.
- There is no need to oil the pan or cover it with parchment paper. The batter must adhere to the sides and bottom of the pan in order to rise.
- Bake for 35-45 minutes until browned and firm to the touch.
- Cool the cake upside down after it’s finished baking. Gravity will aid in maintaining the volume of the product. Start removing the cake from the oven once it has cooled sufficiently. To remove the cake from the pan, use a greased spatula.
- Now that the cake is removed, you can now slice the cakes into small squares. For a more creative presentation, add different frosting and fruit toppings for each square.

How to Make an Angel Food Cake Using Springform Pan
To bake an angel food cake in a springform pan, just follow the same procedure as a regular cake pan, White Claw can and all:
Materials:
- Aluminum Can
- Parchment Paper
- Double Adhesive Tape
Instructions:
- Preheat the oven to 350. Get an aluminum can. The can should be wrapped in parchment paper. Double-sided tape can be used to keep it in place.
- Step two is to sit the wrapped aluminum can in the center of the springform pan. Add some weight to the can to make it more stable. This can be done by weighing a small amount of rice or water fill the can halfway.
- Never grease your pan! Better angel food cake is made when the batter adheres to the sides of the pan rather than sliding down. When baking, a non-greased pan will assist the batter rise.
- Then, you’ll need a circle of parchment paper. For the aluminum can to pass through, make a starburst hole in the middle of the paper. Place the parchment paper on the pan’s bottom.
- Place your batter in the pan, filling it not more than two-thirds-full. Follow your chosen recipe’s time and temperature requirements. Normal baking time is usually around 40-45 minutes when you’re using a springform pan.
- Once the cake is baked, turn it upside down to cool it. Then, remove the sides of the pan, and take out the cake by using a spatula.
- Decorate your angel food cake with your chosen topping and frosting.
What’s the best pan for angel food cake
After testing and writing down several hacks for baking angel food cake without using a tube pan, we can confidently say that the best pan for angel food cake is still a tube pan. But in the absence of a tube pan, any of the pans we mentioned above can be used.
Different pans will offer different cake presentations — if you want to be more creative with your angel food cake, it’s okay to deviate away from the traditional tube pan. Plus, you save a few bucks and free shelf space in your kitchen by using pans you already have at home. Among our favorite alternative methods are the springform pan and the loaf pan, both of which are effective and very easy to use.
However, if we can be entirely honest, the ideal angel food cake pan is one that is readily available and ready to use.
How To Cut Angel Food Cake
Traditionally, the go-to utensil we all use to cut most cakes is a chef’s knife, as it’s something that’s easy to use and works like a charm every single time… Kind of. We can almost hear the angel food cake sitting on your kitchen table, laughing in the background at that statement.
If you’ve ever tried to cut an angel food cake using a chef’s knife, you’ve probably noticed that when you try to do so, the cake doesn’t give way to the blade. Rather, it flattens and even loses, in a way, that wonderful light and airy texture that is so characteristic of angel food cake.
So, if a good ol’ chef’s knife isn’t the best candidate for cutting this cloud-like cake, what else can you use? 3 things: a serrated knife, an electric knife, or a cake breaker.
Hands down, the easiest tool to get is a serrated knife, as you may already have one for slicing crusty — or soft — loaves of bread. It’s also the easiest tool to use, as you’ll just have to place the knife on top of the cake, move it gently with a back-and-forth motion, and let the serrated edge do all the work for you. In no time, you’ll have perfectly cut layers — for adding fillings — or slices of angel food cake! Or cubes, if you’re into fondue.
Besides turkey at Thanksgiving, do you use the electric knife you have stashed at the bottom of the highest shelf in your pantry to cut anything else? We kind of doubt it, but if you don’t know how to cut an angel food cake, you can use it for that task! While it may not be the ideal candidate for cutting the cake into cubes, you can certainly use it to cut the cake into layers or slices quickly. However, be careful with the sawing speed — if it’s too high, it could do more harm than good to your sweet work of art.
Another tool that not everyone knows about is the cake breaker — a.k.a angel food cake cutter —, which looks more like a hair comb than a kitchen tool, but hey, it does what it says it’ll do. To use it, just place it on top of the cake, wiggle your wrist while applying a little pressure — here’s a tutorial! —and that’s pretty much it. It’s a good option if you only want to cut not-so-perfect slices of your angel food cake, but if you want to cut it into cubes or layers to spread some frosting on it, you’re better off sticking with one of the other tools above. BTW, some people even use this gadget as a guide for cutting onions or other vegetables — 2 in 1!
Making An Angel Food Cake FAQs
Although making an angel food cake is rather simple, that doesn’t mean that there are no questions about how to bake or store it. Whether you’re an amateur cook or you have a background in dessert making but still don’t know everything there is to know about this type of cake, don’t worry, because below we’ll answer some of the most commonly asked angel food cake baking questions!
How long will my angel food cake last?
Truth be told, it’s best not to wait too long to enjoy your cakes, especially when it comes to angel food cake. Those fluffy treats are at their prime when freshly baked, so if possible, enjoy it the day you take it out of the oven!
Nevertheless, we know that having a whole cake in just one day is a difficult — but delicious — task and most people will want to save it so they can enjoy it for the rest of the week, or even for several months. So, if you store your angel food cake, how long will it last?
Well, that will depend entirely on how you store it. For example, if you cover it with foil or plastic wrap and keep it in a cake box at room temperature, it will last one to two days, even three. Angel food cakes are delicate to say the least, and knowing how to store them properly will make all the difference between a dry, flavorless cake and a soft, tasty cake.
Can You Refrigerate Angel Food Cake?
If storing your cake in an area of your kitchen at room temperature is not an option because you want to store it longer, you can always turn to ice cream’s best friend: the fridge.
Some people are against refrigerating spongey cakes in the fridge out of fear that they will dry out. However, this only happens if they aren’t refrigerated properly. Long story short, cold circulating air is angel food cake’s biggest enemy as it can dry it out, so to avoid this, grab a roll of plastic wrap and a roll of tin foil and wrap it tightly. That way, the surface of the cake won’t come directly in contact with the low temperature inside the fridge, and it will stay in perfect condition for up to a week.
Now let’s say that a week has passed since you refrigerated your angel food cake, and you’re in dire need of something sweet to get you through a heavy Monday, so you get home, open the fridge, reach for your trusty serrated knife to cut the cake, and… Wait, hold your horses! Don’t take it out of the fridge and cut it right away — rather just leave it out of the fridge for a while before cutting it so it can come back to room temperature and regain its cloud-like texture.
Can You Freeze Angel Food Cake?
Freezing? Wouldn’t freezing my angel food cake take away all its goodness? Not one bit! This type of cake contains no fat or oils since it’s made without butter or whole eggs, thus making it an excellent candidate for freezing. Actually, this storing method works so well on angel food cake that it can even keep it fresh for 6 months. Yup, you read that right, 6 whole months, and without a dip in quality.
The key to successfully freezing such a fluffy cake is, as we mentioned above, to deprive it of all circulating air. While in the refrigeration method the angel food cake runs the risk of drying out if not properly stored in the cold environment, this risk is even greater in the freezing method. The cake could not only dry out, but suffer from freezer burn and be completely ruined, sealing its fate imminently towards your kitchen trash can.
So, in order to prevent that tragedy from happening, simply double wrap your angel food cake using plastic wrap and tin foil and, for extra protection, place it in a lidded plastic container. Try to freeze it at a temperature around 0° F, because if you do it at a lower setting, the risk of the cake suffering from freezer burn will be higher even with its multiple protective layers, and if you do it at a higher setting, it won’t freeze properly. Oh and by the way, once you want to thaw it, follow the same steps as above.
What To Do With Leftover Egg Yolks
Okay so you used all 12 egg whites, baked a wonderful angel food cake, and now… You don’t know what to do with the remaining 12 yolks. This always happens when making anything that only requires the light and transparent part of the eggs, and while every recipe says “freeze the yolks for another dessert,” no one actually gives ideas for another dessert… Until today!
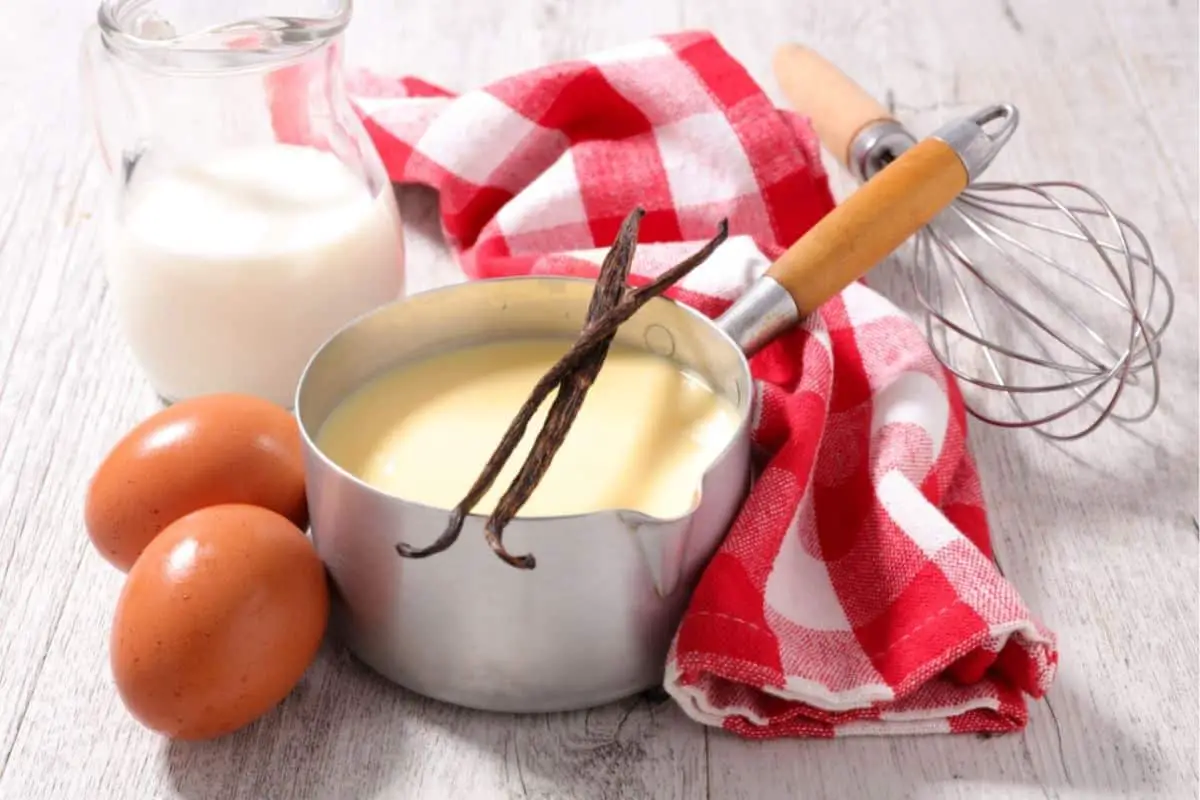
Our instinct is to just tell you, “go make a pound cake!”, which is essentially the dense sibling of angel food cake, but that’s too mainstream. You already have a cake, so the best thing you could do is make something different, or something you can use to decorate the cake… Oh, we just got an idea! Two words: crème anglaise.
Crème anglaise is the perfect match for angel food cake, as the cake will act like a sponge and absorb all its vanilla flavor. Plus, you can use it for other desserts like chocolate soufflés or as a topping for fruits. We’ve been obsessed for years with this crème anglaise recipe that Virginia Willis showed on The Martha Stewart Show several years ago, and if you’re a fan of bourbon, you’re sure to become obsessed too.
Other desserts you can make with leftover egg yolks are a silky ice cream, a citrusy lemon curd, a rich crème brûlée, or if you’re looking for something outside the dessert area, a creamy Hollandaise sauce. Eggs never go to waste!
What Is The Difference Between A Sponge Cake And Angel Food Cake?
While both angel food cake and sponge cake rely on beaten eggs to make them light as a feather, they are far from being the same thing. Yes, they are similar, both have a springy texture that delights any palate, but the biggest difference between a sponge cake and angel food cake is which part of the egg they use.
On the one hand, angel food cake only requires egg whites to keep it as light as possible — they simply need to be whipped into soft peaks to create a fluffy, airy batter. On the other hand, sponge cake uses both egg whites and egg yolks, previously beaten separately and then combined together with the other ingredients. This gives an extra point of flavor to sponge cake and a slightly denser texture.
In addition, some angel food cake recipes specify that cake flour must be used since it doesn’t weigh down the egg whites, while sponge cake can use all-purpose flour without any problem. And if we talk about pans in which these cakes can be baked, there is another clear difference — angel food cakes are mainly baked in tube pans, but sponge cakes can be baked in virtually any cake pan.
Why Do You Have To Cool Angel Food Cake Upside Down?
Basically, cooling the angel food cake upside down prevents it from collapsing. The egg whites are what cause the cake to rise, and until it cools down, its structure won’t set. If we cool the angel food cake like any other cake, its own weight will crush itself. That’s why there are some tube pans that come with feet to easily place it upside down.
Pro-Tip: If you don’t have a tube pan with feet, you can fit the hole of your tube pan over the neck of a bottle or turn it upside down on a cooling rack. The point here is to not cover the pan to promote airflow as it cools!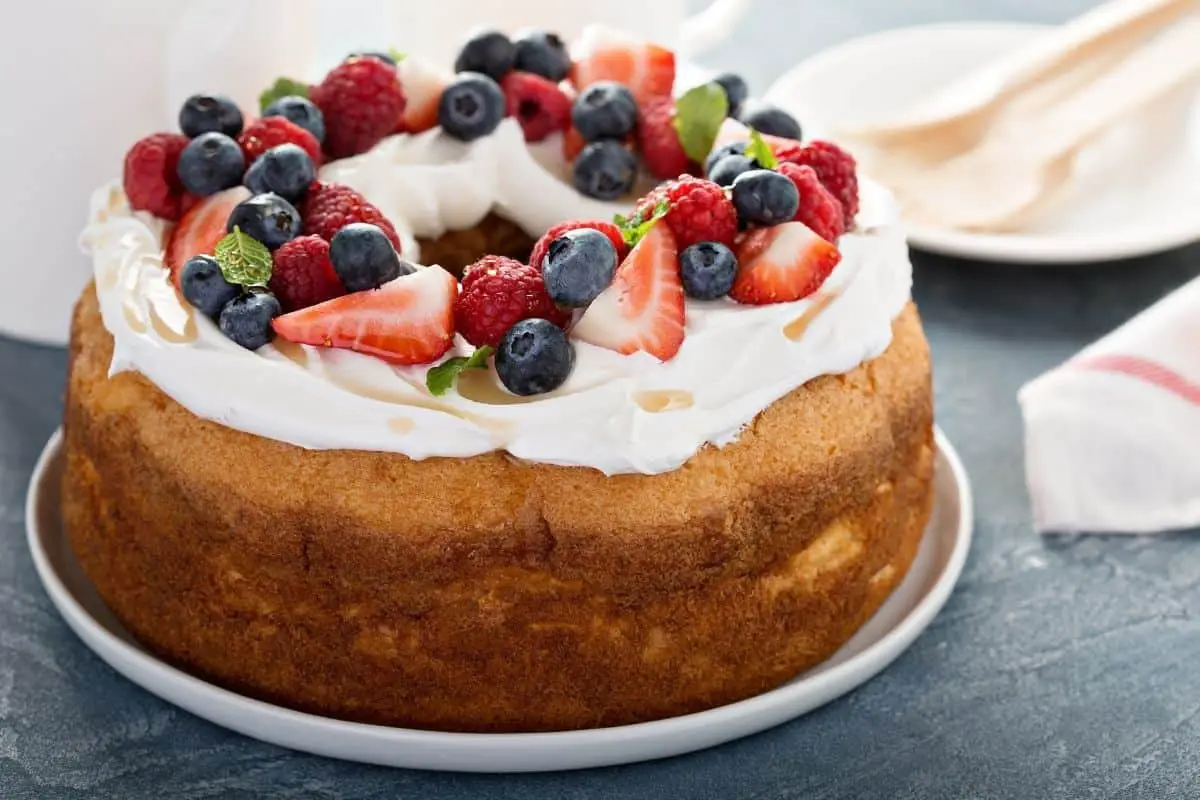
How To Make An Angel Food Cake Without A Tube Pan (5 Ways)
Instructions
HOW TO MAKE AN ANGEL FOOD CAKE USING A REGULAR 9IN CAKE PAN
- Get an empty aluminum can — a skinny can like White Claw or LaCroix works best in this scenario —, and wrap it with parchment paper. Next, secure it using double adhesive tape and trim away the excess paper. Then, fill the can with water to give it weight. Others use beans and rice, but if none of those are available, water is fine. Have in mind that the can should only be half full of your chosen weight.
- Place the parchment-wrapped aluminum can at the center of your regular round pan, then, cut a round parchment paper and place it on the pan. Also, don’t forget to cut a starburst in the middle of the parchment paper for the aluminum can to fit through. You can trace the aluminum can into the parchment paper and cut it, or you can just sort of eye-ball the shape and cut it right away, either way, what matters is that the can fits perfectly.
- IMPORTANT: don’t fill the cake pan more than two-thirds full. Since this is a hack, not an Anna Olson-certified-procedure, the pan may require more or less batter. Just to be safe, follow the suggested measurement — only two-thirds full or less.
- Follow the recipe and the baking instructions of your chosen cookbook or website, which usually state 1 and 3/4 cups of granulated sugar, 1 cup + 2 tablespoons of cake flour, 1/4 teaspoon of salt, 12 large egg whites, 1 and 1/2 teaspoons of cream of tartar, and a splash of vanilla extract to make the perfect angel food cake. But no matter which recipe you use, just stick to the instructed time and temperature. Angel food cakes shouldn’t be rushed!
- Last but not least, cool the cake upside down. The best thing about this hack is that any can is usually taller than the sides of regular cake pans, so once you turn the cake upside down, it will be elevated off of your counter, with a nice airflow. Then, you can use a spatula or thin butter knife to loosen the cake from the pan’s side, and peel away the parchment paper from the bottom of the cake.
HOW TO MAKE AN ANGEL FOOD CAKE USING 8 INCH ROUND PAN (METAL OR GLASS)
- Preheat your oven to 350 degrees and prepare the cake batter according to the box or recipe you’re following. If you’d like to keep the traditional hole in the center of your Angle Food cake wrap your aluminum can with parchment paper. *Note: This is completely optional. You can bake your Angle food cake batter withouth the aluminum can in your cake pan.
- Do not grease the pan! Angel Food Cake is better when the batter sticks to the sides of the pan. An ungreased pan will help the batter rise as it bakes.
- Pour your cake batter into two to three pans, filling it with no more than two-thirds full. Adhere to the time and temperature of your chosen recipe.
- Check your cake around the 23 minute mark. If you can insert a toothpick in the center and it pulls out clean, it is done.
- Once the cake is done, cool your cake upside down. The gravity will help the cake maintain its volume. Then, remove the cake out of the pan. You can use a greased spatula to help you release the cake from the pan.
HOW TO MAKE AN ANGEL FOOD CAKE USING LOAF PAN
- Preheat your oven to 325. Pour the cake batter into the loaf pan. The batter should not fill the pan more than two-thirds full.
- Do not grease the pan or put on parchment paper. For the batter to rise, it needs to cling to the sides and the base of the pan.
- Bake for 35-40 minutes until the top is slightly sticky and brown.
- Once the cake is done, cool it upside down. The gravity will help the make maintain its volume. Now that the cake has cooled down, start taking it out. You can use a greased spatula to help you release the cake from the pan.
- Slice the cake like you are making bread slices. Serve them on small plates. Add your frosting and fruit toppings.
HOW TO MAKE AN ANGEL FOOD CAKE USING 9×13 PAN
- Preheat your oven to 350 degrees and make sure your oven rack is in the middle of the oven. Pour the cake batter into a 9×13 pan. There should be no more than two-thirds of the batter in the pan when you bake it.
- There is no need to oil the pan or cover it with parchment paper. The batter must adhere to the sides and bottom of the pan in order to rise.
- Bake for 35-45 minutes until browned and firm to the touch.
- Cool the cake upside down after it’s finished baking. Gravity will aid in maintaining the volume of the product. Start removing the cake from the oven once it has cooled sufficiently. To remove the cake from the pan, use a greased spatula.
- Now that the cake is removed, you can now slice the cakes into small squares. For a more creative presentation, add different frosting and fruit toppings for each square.
HOW TO MAKE AN ANGEL FOOD CAKE USING SPRINGFORM PAN
- Preheat the oven to 350. Get an aluminum can. The can should be wrapped in parchment paper. Double-sided tape can be used to keep it in place.
- Step two is to sit the wrapped aluminum can in the center of the springform pan. Add some weight to the can to make it more stable. This can be done by weighing a small amount of rice or water fill the can halfway.
- Never grease your pan! Better angel food cake is made when the batter adheres to the sides of the pan rather than sliding down. When baking, a non-greased pan will assist the batter rise.
- Then, you’ll need a circle of parchment paper. For the aluminum can to pass through, make a starburst hole in the middle of the paper. Place the parchment paper on the pan’s bottom.
- Place your batter in the pan, filling it not more than two-thirds-full. Follow your chosen recipe’s time and temperature requirements. Normal baking time is usually around 40-45 minutes when you’re using a springform pan.
- Once the cake is baked, turn it upside down to cool it. Then, remove the sides of the pan, and take out the cake by using a spatula.
- Decorate your angel food cake with your chosen topping and frosting.
Nutrition information provided is an estimate. It will vary based on cooking method and specific ingredients used.


